
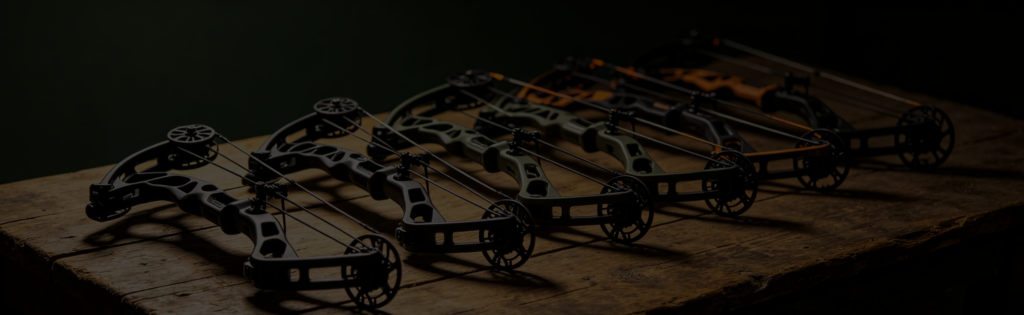
The best beginner compound bow is a highly adjustable, ready-to-shoot package – one bow that covers a wide draw-length and draw-weight range and comes with a sight, rest, and quiver. Start at a draw weight you can pull smoothly (often 40-50 lbs for adults, lower while you learn), set the draw length to your body, and add a release aid. Adjustability matters far more than speed or brand for a first bow.
Fletchwise guides are independent and hype-free – we are not sponsored by any archery brand.
Why Adjustable "Ready-to-Shoot" Bows Win for Beginners
As a new archer, two things will change quickly: the draw weight you can handle and your understanding of what you want. A bow with a wide adjustment range lets you start light, build strength, and dial in your draw length without buying another bow. Ready-to-shoot (RTS) packages bundle the essential accessories – sight, rest, quiver, sometimes a release – already mounted, so you can shoot on day one instead of assembling a parts list.
Getting the Fit Right
Draw Length
This is the most important spec and it must be set to your body. A bow at the wrong draw length cannot be shot accurately. Have it measured, and choose a bow whose range includes your number.
Draw Weight
Start lighter than your ego wants. Most adult beginners do well at 40-50 lbs; many adjustable bows let you set it lower while you learn good form, then crank it up. You should be able to draw smoothly without “skybending” the bow upward.
Hand & Eye Dominance
Choose left- or right-hand based on your dominant eye, not your dominant hand. About a quarter of people are cross-dominant, and buying a bow for the wrong side because you guessed from their writing hand is a common, avoidable reason a beginner cannot get consistent. Do a quick eye-dominance test before buying: make a small triangle with both hands, look through it at a distant object with both eyes open, then close one eye at a time – whichever keeps the object centred is the dominant eye, and that is the side to set the bow up for.
Target Panic Is Part of the Gear Choice, Not Just a Skill Problem
Most beginner guides treat target panic as something you work through later, with practice. It is better treated as something you can largely prevent now, with one equipment decision, because the release aid you learn on decides how hard it is to un-learn the habit later.
Target panic is a mental block that shows up differently in different archers – an inability to settle the pin on the intended spot, a punched trigger the instant the sight picture looks acceptable, or an anticipation flinch that throws the arrow before the conscious mind catches up. It is extremely common, most archers face it at one time or another, and it is not a mark of being bad at archery – it is the predictable end result of a release style that puts a trigger under your index finger and trains your brain over thousands of shots that squeezing it is the point.
That is why the release aid you choose as a beginner is not a comfort decision. There are three types, and they are really choosing how exposed you are to developing the habit:
- Index-finger (wrist-strap) release – the default, the most common, and the one most likely to perpetuate a trigger-punch once it takes hold. Your index finger pulls a trigger, exactly like a firearm, and the brain learns to anticipate the shot and command the finger slightly ahead of the decision to actually shoot. This is the release that target panic is built on.
- Hinge (back-tension) release – no trigger to punch. The release fires by hand rotation: you anchor, keep pulling, and the hinge rotates through its firing sequence as a surprise. This transfers activation from "I decided to pull the trigger now" to "the release went off when the pull was right."
- Tension-activated (resistance) release – fires only when pulling pressure reaches a set threshold. You anchor and keep pulling until the release lets go. There is nothing to punch and no way to cheat it by twisting the handle, which is why it is one of the most effective tools for both preventing and curing target panic.
The honest position: the index-finger release is fine to start on, and it is what will come in most ready-to-shoot packages. But if you notice yourself snapping at the trigger the moment the pin touches the target – or if you have any history of anticipating a shot from another sport – skip the index release and start on a hinge or a tension release instead. Un-training a punched trigger is far harder than learning a hinge from scratch, and the average beginner who needs to beat it takes about three weeks to rewire the habit. The full breakdown of each type is in our release aid guide.
What Your First Setup Needs
- The bow – adjustable, fitted to your draw length.
- Arrow rest – a forgiving containment or drop-away rest.
- Sight – a multi-pin fiber-optic sight to start.
- Release aid + D-loop – for clean, consistent shots.
- Peep sight – your rear reference in the string.
- Arrows – carbon, correct spine, cut to your draw length.
- A target – a bag or foam target for high-volume practice.
Budget for the accessories separately from the bow. A rest, sight, release aid, D-loop and peep sight run roughly $115-215 for budget parts, or $310-560 mid-range – on top of whatever the bow itself costs, plus arrows and a target. A “ready-to-shoot” ad price is describing the bow with some of that already bundled in, so check exactly what is included before you assume the number is the whole cost. Our bow accessories guide breaks down what to buy first and in what order.
Should Your First Bow Be New or Used?
Every used-bow buying guide opens with the same requirement: know your draw length and draw weight before you buy. That is sound advice for an experienced archer replacing a bow – and a real catch for a total beginner, because your draw length and comfortable draw weight are still moving targets in your first months. Form changes as you build the right muscles, and the weight that feels fine on day one can feel wrong by week three as your technique improves. A used bow locked to someone else’s tune and a fixed setup assumes you already know things you have not learned yet.
This is exactly why an adjustable, ready-to-shoot package – new, not used – solves a problem a used bow cannot: you do not have to get your specs right before you buy, because the bow adjusts to you as you find them. A used bow can be a smart second purchase once you know your numbers and what you actually want; as a first bow, its fixed setup fights the one thing you are still figuring out. If you go used anyway, our used compound bows guide covers the checklist – budget extra time with a press-equipped shop to get it re-tuned to you rather than assuming it fits as-is.
Beginner Mistakes to Avoid
Do not buy on advertised speed, do not start at too high a draw weight, and do not buy a fixed-draw-length bow that does not fit you. Avoid skipping a release aid, shooting uncut or mismatched arrows, and buying a no-name bow you cannot get parts or strings for. And never dry-fire a compound (shoot it with no arrow) – it can destroy the bow and injure you.
We will add hands-on beginner bow picks as our shop launches. For now, take this checklist to a pro shop that can measure your draw length and let you test-pull a few adjustable bows.
Frequently Asked Questions
A highly adjustable, ready-to-shoot package with a wide draw-length and draw-weight range. It fits you now, grows with you, and comes with the essential accessories already mounted so you can start shooting immediately.
Most adult beginners do well at 40-50 lbs, and many start lower on an adjustable bow while building form. Pick a weight you can draw smoothly and hold under full control without straining.
For a compound, yes – a release aid clipped to a D-loop gives a far cleaner, more consistent shot than fingers and is standard for compound shooting. It is one of the best early accuracy investments.
A solid adjustable ready-to-shoot package is enough to learn on without overspending. Put your money into fit and adjustability and a decent string rather than chasing top-end speed or a flagship model.
A wrist-strap index-finger release is the default and is fine to learn on. But if you find yourself punching the trigger the instant the pin touches the target – or you have any history of anticipating a shot from another sport – switch to a hinge or tension-activated release instead. Un-training a punched trigger later is far harder than learning a hinge from the start. See our release aid guide for the full breakdown of each type and why the choice matters for accuracy.
Target panic is a mental block where you cannot settle your pin on the intended spot, punch the trigger before you consciously decide to shoot, or flinch in anticipation of the shot. It is extremely common and most archers face it at some point. It is largely tied to the release aid you learn on – an index-finger trigger trains the brain to anticipate and punch, while a hinge or tension release fires as a surprise through back tension, which prevents the habit from forming in the first place. If you are already fighting it, the average archer takes about three weeks of retraining to beat it.
Usually not the full picture. Beyond the bow, budget roughly $115-215 for a budget rest, sight, release aid, D-loop and peep sight, or $310-560 for mid-range parts, plus arrows and a target. A “ready-to-shoot” package bundles some of this in already, but check exactly what is included rather than assuming the advertised price is the total cost.
New, in most cases, for a reason most used-bow guides miss. Buying used assumes you already know your draw length and draw weight, but as a first-time archer those numbers are still moving while you build strength and form. An adjustable, ready-to-shoot new bow solves that by letting you dial in your specs after buying instead of needing them nailed down first. A used bow can be a smart second bow once you know your numbers.
Submit the Form to Get Our Product Catalog
What We Can Offer
- ✅ Low MOQ – from 1 piece, no minimum order
- ✅ Full customization – names, initials, club crests & team logos
- ✅ Mockup before production – see it before we make it
- ✅ Production time about 2 weeks after mockup approval
- ✅ Free remake on defects within 14 days of delivery
We reply to every inquiry within 1 business day.
Email: [email protected]
WhatsApp: +1 770 157 5807
Keep Reading
Parts of a Compound Bow
Every component explained, from the riser and cams to the D-loop, so you can buy and tune with confidence.
Parts of a Compound BowBest Compound Bows
How to choose without chasing the FPS number on the box, since real hunting setups run 30-60 fps slower.
Best Compound BowsCompound vs Recurve
The real tradeoffs beyond traditional vs modern – let-off, cost, learning curve and what each teaches you.
Compound vs Recurve