
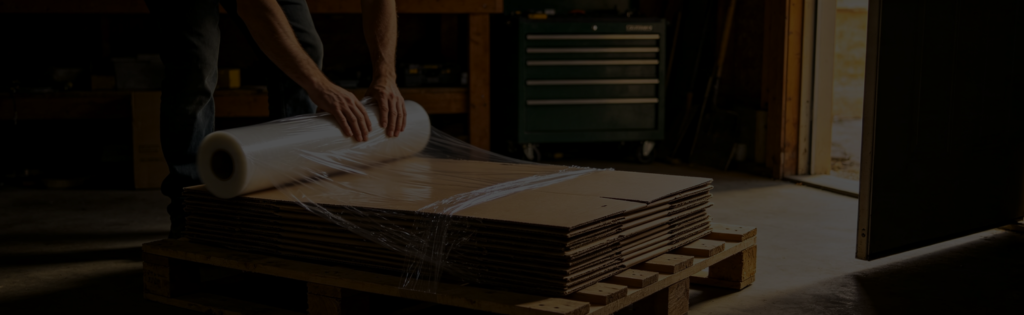
The most reliable DIY archery target is a tightly compressed stack of foam or shrink-wrapped cardboard inside a wooden frame. Compression is the secret – loosely packed material lets arrows pass through. A stretch-film-wrapped bundle of stacked cardboard or carpet foam, held under tension, stops field points well and costs very little. DIY targets are best for field points only; for broadheads and high-poundage bows, buy a rated foam or layered target.
Fletchwise guides are independent and hype-free – we are not sponsored by any archery brand.
A DIY target’s stopping power is never guaranteed. Always shoot into a natural backstop (a dirt bank or plywood-backed fence), inspect the target before every session, and stop using it the moment arrows start penetrating too deep or passing through.
Why Compression Is Everything
Every DIY archery target works on the same principle: the tighter the material is packed, the more friction it puts on the arrow, and the faster it stops. A loose bag of rags or crumpled cardboard will let arrows sail through. The methods below all rely on compressing the material and holding it under tension so it behaves like a commercial bag or block target.
Method 1: Stretch-Wrapped Cardboard (Cheapest)
- Collect flat cardboard. Break down boxes and stack the sheets flat, all facing the same direction, into a pile about 18-24 inches thick.
- Compress the stack. Press the pile down hard – stand on it or clamp it – to squeeze out the air gaps.
- Wrap it under tension. Wrap the whole bundle tightly with stretch film (pallet wrap), pulling hard on every pass so the cardboard stays compressed. Wrap all the way around in both directions.
- Add a face. Tape a paper target face to the wrapped edge (the cut edges of the cardboard, not the flat side) so arrows enter between the layers.
- Stand it up. Lean it against a solid backstop or set it in a simple frame – see our target stand guide for the one component (a spread limiter) that most homemade frames leave out.
The Cardboard Detail Almost Every Guide Skips: Grain Direction
Stack cardboard flat and most of it still fails, because corrugated board is not uniform – it has a wavy inner layer running in one direction, and that direction decides whether an arrow tears across dozens of tiny air channels or slides straight down one.
- Orient the flutes cross-grain to your shot line. An arrow hitting the corrugation channels end-on can find a gap and thread through with far less resistance than one that has to punch sideways across the wave pattern. Turn each sheet so the flutes run up-and-down, not toward you.
- Stagger the direction between layers. Alternate sheets so the flute direction differs layer to layer through the stack, so there is no continuous channel running all the way through the target at any point.
- Use double or triple-wall board only. Thin single-wall boxes from small retail packaging do not have enough material per sheet to matter – save moving boxes and appliance boxes, which use double or triple-wall board.
This is the difference between a stack that looks compressed and one that actually is – two targets built with identical thickness and the same stretch-wrap tension can perform very differently based on flute direction alone.
Method 2: Foam Scrap in a Wooden Frame (Most Durable)
- Build a simple box frame from 2×4 or plywood, open on the front and back faces.
- Pack it with foam. Fill the frame with high-density foam scraps, carpet padding, or layered foam mats – the denser, the better.
- Compress as you fill. Force in more material than seems to fit so the foam is under constant pressure inside the frame.
- Add a removable end plate so you can top up foam as the center wears out.
- Cover the face with a layer of old carpet or a paper target to protect the foam edge.
Method 3: Foam Mats / Rubber Mulch Bag (Quick)
- Stack interlocking foam gym mats to about 12-18 inches thick, or fill a heavy feed sack with packed rubber mulch.
- Ratchet-strap the bundle tight to keep it compressed.
- Hang or stand it against a backstop and add a target face.
What Not to Use
Skip loose materials that do not compress well or that wreck arrows: hay and straw (arrows blow through and it rots), loose plastic bags, sand or dirt (destroys tips and fletching), and anything with hard objects buried inside. Foam and tightly packed cardboard are the proven choices.
The Backstop Matters More With a DIY Target, Not Less
A homemade target’s stopping power is inherently less predictable than a rated commercial one, which makes what stands behind it more important, not less. Give it at least 25-30 yards of clear space beyond the target before anything you cannot afford to hit, and lean toward more distance than you would with a purpose-built target, since there is no manufacturer’s rating to trust if the stack turns out thinner or looser than it looked when you built it. Our target buying guide covers backstop distance, yard orientation and local ordinances in more depth – worth reading before you build, not after a pass-through.
Check Before You Build: Is Backyard Archery Legal Where You Live?
No federal law bans shooting a bow in your own yard, but that does not make it automatically legal where you live. Discharge-of-a-projectile ordinances at the city or county level often cover archery even though they were written with firearms in mind, and some set a minimum distance from an occupied building before you can legally loose an arrow – a distance that varies enormously by jurisdiction and can rule out a typical suburban lot entirely. Crossbows are often treated more strictly than bows, sometimes falling under the same rules as firearms. If you live under an HOA, its own rules can ban backyard archery outright regardless of what the city or county allows.
Before you build any of the targets above, search your municipal code (most cities publish it through Municode or American Legal) for "archery," "bow and arrow," or "discharge of a projectile," or call your local police non-emergency line – the officers who patrol your street already know the answer. It takes about ten minutes, and it is the one step that keeps a correctly built, fully compressed target from still ending in a visit from a neighbour or a citation.
Is DIY Actually Cheaper, or Just Cheaper Up Front?
The materials cost is real and it is small – free scrap cardboard plus a roll of stretch film runs well under $20, and even a from-scratch foam build in a wooden frame has been done for around $50-60 in materials against a few hundred for a similarly sized purpose-built target. That comparison is accurate, and it is also incomplete, because it only counts the first build.
A DIY target’s honest running cost has two parts most guides leave out. First, rebuild frequency: a well-compressed cardboard stack holds up for casual practice but wears faster at the point of impact than a proper layered or foam target built specifically to spread wear, so budget for re-wrapping or restacking rather than a one-and-done build. Second, weather: cardboard is a paper product, and stretch film keeps rain off the outside but will not save a target that gets left out and soaks through – store it dry between sessions if you want it to last, or accept that an outdoor cardboard target is seasonal, not permanent.
None of that makes DIY a bad choice – it makes the honest comparison a materials cost plus your own time on rebuilds, against a purpose-built target’s higher upfront price and lower maintenance. For casual field-point practice on a budget, that trade is usually worth it. For broadheads, a high-poundage compound or crossbow, or if you would rather not think about it again for a few years, a purpose-built foam or block target is the better trade, not just the safer one.
Frequently Asked Questions
Compressed foam (carpet padding, foam mats, or high-density foam scrap) is the most durable, and tightly stretch-wrapped cardboard is the cheapest. Both work because they hold the stopping material under tension.
It is not recommended. Homemade targets rarely stop broadheads safely or pull cleanly, and blades tear up cardboard and foam quickly. Use a commercial broadhead-rated target for broadhead practice.
A well-compressed foam or cardboard target can stop field points from a moderate-poundage bow. For fast, high-poundage compounds and crossbows, stopping power is unreliable – buy a rated target instead.
Compress harder and add more material. Pass-throughs almost always mean the stack is too loose or too thin. Re-wrap or re-pack it under tension, and always shoot into a backstop.
Hay and straw compress poorly, so arrows pass straight through, and the bales rot and fall apart outdoors. They also do little to protect arrows. Foam or packed cardboard is far better.
Cross-grain to your shot line, not toward you. Corrugated board has a wavy inner channel running one direction, and an arrow hitting those channels end-on can find a gap and slide through more easily than one that has to punch sideways across the wave pattern. Stagger the flute direction between layers as you stack, and use double or triple-wall boxes rather than thin single-wall packaging.
Up front, clearly yes – free scrap cardboard and a roll of stretch film cost well under $20, and even a from-scratch foam build has been done for around $50-60 against several hundred for a comparable purpose-built target. Long term it is closer than it looks: a DIY target wears faster at the impact point and needs re-wrapping or restacking sooner, and outdoor cardboard needs to be kept dry between sessions or it will not last a season. The honest trade is materials cost plus your own rebuild time versus a higher upfront price with less maintenance.
At least 25-30 yards of clear space beyond it, and lean toward more than you would give a purpose-built target. A homemade target has no manufacturer rating to trust, so if the stack is thinner or looser than it looked when you built it, the margin behind it is what actually keeps a miss or pass-through from becoming a real problem.
It depends entirely on your city, county, and HOA – there is no federal law against it, but many places regulate archery under discharge-of-a-projectile ordinances, sometimes with a minimum distance from occupied buildings, and crossbows are often restricted more tightly than bows. Check your municipal code (searchable through Municode or American Legal) for "archery" or "discharge of a projectile," or call your local police non-emergency line, before you build a target rather than after.
Submit the Form to Get Our Product Catalog
What We Can Offer
- ✅ Low MOQ – from 1 piece, no minimum order
- ✅ Full customization – names, initials, club crests & team logos
- ✅ Mockup before production – see it before we make it
- ✅ Production time about 2 weeks after mockup approval
- ✅ Free remake on defects within 14 days of delivery
We reply to every inquiry within 1 business day.
Email: [email protected]
WhatsApp: +1 770 157 5807
Keep Reading
Archery Targets: Full Guide
All four target types compared – bag, foam, layered and 3D – matched to your draw weight and broadhead use.
Archery Targets: Full GuideBest Foam Archery Targets
Density and depth decide real lifespan far more than price, and how to judge a block before it is shot out.
Best Foam Archery TargetsBest 3D Archery Targets
Deer, turkey and hog targets with replaceable vital-zone cores, and why self-healing foam does not mean unlimited broadhead life.
Best 3D Archery Targets