
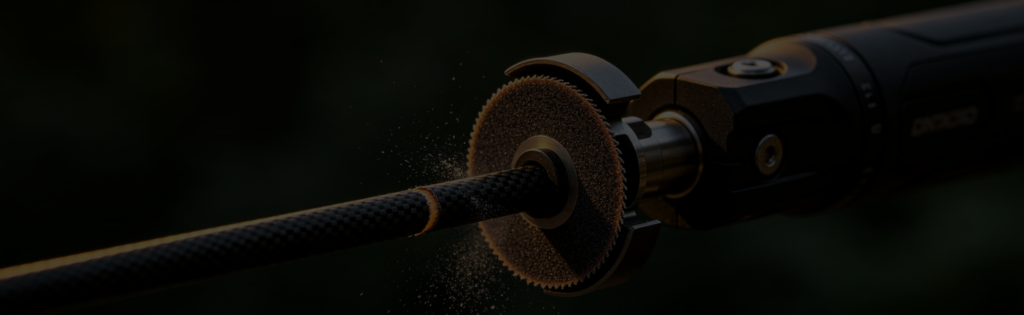
Carbon arrows must be cut by abrasion, not by shearing. That single rule decides every tool question. An abrasive wheel – a dedicated arrow saw, or a rotary tool with a heavy cut-off disc – grinds through the fibers and leaves a clean end. A pipe cutter or tubing cutter shears, which breaks the fibers off and can crack the shaft, and a hacksaw tears the weave. Cut a little long and creep up on your final length, because you cannot put material back. Wear a mask or wet the cut with soapy water: carbon dust is the real hazard in this job, not the blade.
Fletchwise guides are independent and hype-free – we are not sponsored by any archery brand and we do not sell tools.
Why Carbon Has to Be Ground, Not Cut
A carbon shaft is not a tube of homogeneous material, it is a wound structure of fibers in resin. Its strength runs along those fibers. Any tool that works by squeezing a blade inward – which is exactly what a pipe cutter does – loads the fibers sideways, snaps them, and leaves the tube ends splintered and out of round. Worse, that sideways load can start a crack that runs back up the shaft where you will not see it.
An abrasive wheel spinning at speed does the opposite: it removes material at the cut line without loading the tube. That is why every dedicated cutter for this job is an abrasive wheel rather than a blade, and why the same rule applies whichever tool you improvise with. Aluminum shafts are more forgiving – they can tolerate a tubing cutter – but an abrasive cut is still cleaner, and most people cutting arrows today are cutting carbon or carbon-aluminum.
Tool by Tool
| Tool | Use it? | What to know |
|---|---|---|
| Dedicated arrow saw | ✅ Best | Abrasive wheel plus a shaft support and length stop. The stop is most of what you are paying for – repeatability across a dozen shafts |
| Rotary tool with cut-off disc | ✅ Works | Use the heavy reinforced discs. The thin ones shatter in use. Rig a V-block and a stop, and rotate the shaft into the wheel |
| Angle grinder with thin cut-off wheel | ⚠️ Possible | Cuts fine but hard to hold square by hand. Needs a jig, or you will be squaring the end afterwards anyway |
| Belt or disc sander | ⚠️ For squaring | Poor at cutting to length, good at truing an end that is already close |
| Pipe / tubing cutter | ❌ No | Shears instead of grinding – breaks the fibers off and can crack the shaft. Listed as an option in some guides anyway |
| Hacksaw or fine-tooth handsaw | ❌ No | Tears the weave and leaves a frayed, out-of-square end that no amount of sanding rescues |
| Tin snips, bolt cutters, anything shearing | ❌ No | Crushes the tube. This is how a shaft ends up failing months later |
Two of those rows are the whole reason this page exists. The pipe cutter is the tool most people reach for, because a carbon arrow looks like small-diameter tube and a pipe cutter is the obvious tube tool. And the rotary tool is genuinely fine – as long as you use the thick discs, which is the detail that gets left out of most instructions and the reason people report discs exploding mid-cut.
The Hazard Is the Dust
Cutting carbon produces very fine airborne dust that you do not want in your lungs, and it is far more of a real-world risk than the wheel is. It is also an irritant on skin. Two practical mitigations, either of which is a large improvement over neither:
- Wet the cut. A spray bottle of soapy water on the wheel and the shaft keeps the dust from becoming airborne in the first place. This is the trick that experienced fletchers use and it costs nothing.
- Ventilate and mask. Cut outdoors or in a well-ventilated space, with a proper particulate mask rather than a dust nuisance mask. A shop vac at the cut helps.
Also worth knowing: the cut end is sharp and slightly abrasive. Deburr the inside edge lightly before you glue anything into it, or you will shave the insert as it goes in. Our arrow saw page goes deeper on dust handling and on why the squared end matters as much as the length.
Cutting to Length Without Ruining a Dozen Shafts
The mechanical part is easy. Getting twelve arrows to the same length is the part that goes wrong, and it goes wrong in a predictable order.
Decide the length before you cut anything. Draw length, insert and point weight, and the rest position all feed into it, and cutting a shaft shorter stiffens it – so length is also a spine decision, not just a fit decision. Get this from a shop or a spine chart before the wheel spins. Our arrows for a compound bow page covers how the numbers interact.
Cut one, build it, shoot it, then cut the rest. This is the discipline that saves money. A single test arrow tells you whether the spine is right at that length before you have committed the other eleven.
Measure from a fixed reference, not from the last arrow. Measuring each shaft against the previous one accumulates error down the dozen. Use a hard stop – which is precisely what a dedicated saw gives you and what any improvised setup needs to copy.
Apply steady pressure. Let the wheel do the work and rotate the shaft into it rather than jerking or shoving the arm down. Pressure spikes are what chip the end.
Which End Do You Cut From?
Most instructions assume you take all your length off the point end and leave it there. That is usually the right default, but it is worth knowing why, because in a few situations the answer changes.
A misaligned or out-of-round nock end costs you more accuracy than the same flaw at the point end – for anything short of a large fixed broadhead, nock alignment matters more to how straight the arrow leaves the string than point alignment does. That is the reason to protect the nock end and take the trim off the point side by default: you are keeping the better, straighter section of the shaft where it matters most. It also helps that the point end tolerates variance better in practice, since an insert is glued in and a slightly imperfect fit is forgiving in a way a nock is not.
Two situations change the calculus. If you need to remove more than a token amount, or the shaft has any doubt about straightness along its length, cutting roughly equal amounts from both ends and keeping the straightest middle section outperforms taking it all from one end. And if you are re-fitting a new nock anyway – rather than reusing the factory-fitted one – taking length from the nock end is perfectly fine, since you are not preserving anything the factory did there.
Weight-Matching the Finished Dozen
Cutting every shaft to the identical length gets you most of the way to a matched dozen, but not all the way – manufacturing variance in the shaft itself, plus small differences between inserts, nocks, vanes and points, still leaves finished arrows that are not quite identical in total weight. For casual shooting that variance does not matter. For anything you are trying to tune seriously, it does: arrows that differ by even a few grains in finished weight can print differently at distance, and weight-matching is reported to move group size more than spine testing alone does.
The practical version does not require exotic equipment: weigh each bare shaft before you build, and weigh the finished arrow – shaft, insert, nock, vanes and point together – rather than assuming identical components net out to identical arrows. A scale that reads to a tenth of a grain lets a careful builder get a full dozen within a couple of grains of each other. If that is more precision than you need, a commonly used commercial-grade standard – within about 20 grains and a 5 lb spine group – is a reasonable target for anyone not chasing competition-level consistency.
Flex-test any used shaft before it goes near a wheel, and never cut a shaft you suspect is cracked. After cutting, check the end is square and unfrayed. A carbon arrow that fails at the shot is a hand injury, not an inconvenience – if in doubt, retire the shaft.
Is a Dedicated Cutter Worth Buying?
Honest arithmetic: a shop typically charges a small per-arrow fee to cut a dozen, and a dedicated saw is a real outlay. If you cut one dozen a year and never change point weight, the shop wins on money. Buy the tool when one of these becomes true – you are experimenting with arrow length and point weight and want to iterate without a drive, you fletch and build your own arrows anyway, or you shoot enough that broken shafts get replaced through the season.
If you already own a rotary tool, that calculation changes: heavy cut-off discs cost very little, and a scrap-wood V-block with a screw as a length stop turns it into a workable arrow cutter for the price of the discs. That is the setup most people should try before spending on a purpose-built saw. The rest of the home workshop kit is covered in our archery tools guide, and if you are assembling arrows from scratch, start at arrows and broadheads.
No affiliate links on this page and we do not sell tools. Cutting your own arrows voids nothing, but it does move responsibility for the shaft’s integrity to you – shops carry insurance and a spine chart, and for a first dozen that is worth something.
Frequently Asked Questions
Yes, provided the tool cuts by abrasion. A rotary tool with a heavy reinforced cut-off disc, or an angle grinder with a jig, will do the job. What you cannot use is anything that shears – pipe cutters, hacksaws, snips. Rig a V-block and a length stop so the cut is square and repeatable.
No. A pipe cutter squeezes a wheel into the tube and shears it, which breaks the carbon fibers off rather than cutting them and can crack the shaft – sometimes starting a crack that runs up the arrow where you will not see it. It is the most common wrong tool for this job precisely because an arrow looks like small tube.
Yes, and it is the best budget option if you already own one – but use the heavy reinforced cut-off discs, not the thin ones. Thin discs shatter in use. Support the shaft in a V-block, add a stop for repeatable length, and rotate the shaft into the spinning wheel with steady pressure.
The fine airborne dust is the real hazard in this job and it should not be inhaled; it also irritates skin. Wet the wheel and shaft with soapy water from a spray bottle to stop the dust becoming airborne, work in a well-ventilated space or outdoors, and wear a proper particulate mask.
Yes – a shorter shaft is stiffer. That means length is a spine decision as well as a fit decision, and it is why you should settle on length using a spine chart or a shop’s advice before you cut, then build and shoot one arrow before committing the rest of the dozen.
Measure every shaft against one fixed hard stop, never against the previous arrow – measuring arrow-to-arrow accumulates error down the dozen. A length stop is most of what a dedicated arrow saw is actually selling you, and any improvised setup needs to copy it.
For a first dozen, probably yes – it is cheap, and the shop’s spine chart comes with it. Buy your own setup once you want to iterate on length and point weight without a drive each time, or once you are building and fletching your own arrows anyway. If you own a rotary tool already, heavy cut-off discs and a scrap-wood jig cost very little.
Take the length off the point end by default. A misaligned or out-of-round nock end costs more accuracy than the same flaw at the point end for anything short of a large fixed broadhead, so protecting the straightest section for the nock is the safer choice – and an insert glued into the point end tolerates minor imperfections better than a nock does. Trim roughly equal amounts from both ends instead if you need to remove more than a token length, or if you are fitting a new nock anyway and are not preserving the factory one.
Only if you are tuning seriously rather than shooting casually. Identical length gets you most of the way there, but shaft manufacturing variance and small differences between inserts, nocks, vanes and points still leave finished arrows slightly different in total weight, and even a few grains of difference can print differently at distance. Weigh bare shafts before building and weigh completed arrows rather than assuming matched components net out equal. A careful builder with a scale reading to a tenth of a grain can get a dozen within about two grains of each other; a commercial-grade target of roughly 20 grains and a 5 lb spine group is reasonable for anyone not chasing competition-level consistency.
Submit the Form to Get Our Product Catalog
What We Can Offer
- ✅ Low MOQ – from 1 piece, no minimum order
- ✅ Full customization – names, initials, club crests & team logos
- ✅ Mockup before production – see it before we make it
- ✅ Production time about 2 weeks after mockup approval
- ✅ Free remake on defects within 14 days of delivery
We reply to every inquiry within 1 business day.
Email: [email protected]
WhatsApp: +1 770 157 5807
Keep Reading
Arrow Saws
Dust safety, squaring shafts to length, and what a dedicated arrow saw costs versus a cheap manual cutter.
Arrow SawsCarbon Arrows
The standard shaft material and how spine, not brand, decides whether your arrows fly true.
Carbon ArrowsArchery Tools
What a home arrow-building bench actually costs at three budget tiers, and the one tool most archers over-buy.
Archery Tools