
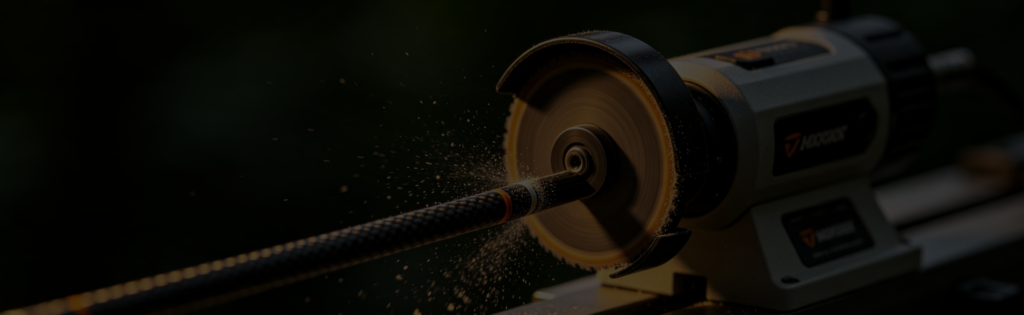
An arrow saw uses a high-speed abrasive wheel to part a carbon or aluminum shaft without splintering it, which a toothed blade cannot do. Two things matter more than the saw you buy. First, carbon dust is genuinely hazardous – a P100-rated mask, or a saw with water drip and vacuum extraction, is the difference between a safe job and a bad one. Second, a cut end is rarely square, and an unsquared end makes the arrow wobble and the insert sit crooked, so a squaring tool is not optional. On cost: shops usually charge about $1 a shaft and often nothing if you bought the arrows there, while a purpose-built saw runs around $160 – so it repays only if you build arrows by the dozen.
Fletchwise guides are independent and hype-free – we are not sponsored by any archery brand and we do not sell saws.
A standard toothed blade grabs carbon fiber and splinters the shaft, leaving a frayed end that will not take an insert cleanly and can fail under load. Carbon is parted by abrasion, not by cutting – which is exactly why a plain hacksaw is wrong for it but a tubing cutter, which crushes rather than abrades, is equally wrong and arguably worse. Never use a tubing cutter on carbon.
What an Arrow Saw Actually Is
An arrow saw is a small high-speed abrasive cut-off wheel in a jig, with a scale for setting length and a rest for the shaft. The wheel does not have teeth. It wears through the material rather than slicing it, which is exactly what carbon needs – the fibers get abraded away instead of being torn out of the resin.
That is also why a rotary tool with an abrasive disc works as a budget substitute, and why a hacksaw never does. The difference between the rotary tool and a purpose-built saw is not the cut itself but everything around it: a length scale, a stable rest, and somewhere for the dust to go.
Aluminum Is a Different Material - and a Different Rule
Everything above is specific to carbon, and that matters because aluminum shafts are cut a completely different way. An inexpensive tubing cutter – the same tool used on copper pipe – gives aluminum a clean, square-ish cut every time, no abrasive wheel or dust required. It is the tool you should reach for on aluminum and the one tool you must never use on carbon: on aluminum it crushes cleanly through a ductile metal tube, but on carbon it crushes the fibers instead of parting them, and a crushed carbon shaft can fail under load when it matters most.
Two aluminum-specific catches worth knowing before you buy a tubing cutter: it typically leaves a slight lip that needs chamfering before an insert will seat, and it is still worth truing the end afterward – a tubing cutter gets you close to square, not guaranteed square. If your arrows are aluminum rather than carbon, this is the cheaper and simpler route, and everything on this page about abrasive wheels and carbon dust does not apply to you.
One more option exists for carbon specifically, for anyone without access to a saw at all: a carbide-grit hacksaw blade – not a standard toothed blade, but one coated in tungsten carbide that cuts by abrasion the same way a wheel does. Used correctly – dragged backward across the shaft, never pushed forward into it – it will part carbon cleanly without splintering. It is slow and it still throws dust, so the same mask and ventilation rules apply, but it is a legitimate manual fallback, unlike a toothed blade or a tubing cutter.
Carbon Dust Is the Actual Hazard
This is the part that gets one line in most guides and deserves more. Abrading carbon fiber throws off very fine airborne dust. It is an irritant to skin, eyes and airway, and it is not something to breathe casually in a closed garage.
- Wear a proper mask. A correctly fitted P100-rated dust mask meets the requirement for this kind of work. A cloth mask or a bandana does not filter particles this fine.
- Eye protection, always. The wheel spins fast and the debris is sharp.
- Keep the dust out of the air in the first place. Better saws include a water drip and a vacuum attachment, which together cut airborne dust dramatically.
- The cheap version of the same idea: a spray bottle of soapy water. Wet the blade and the shaft before cutting and the dust stays down instead of hanging in the room.
- Work somewhere ventilated and wipe down afterward rather than brushing dust into the air.
None of this is exotic. It is the difference between a tool you can use regularly and one that leaves you itching for two days.
Technique Matters as Much as the Tool
Two shafts cut on the identical saw can come out differently depending on how you feed the shaft in, and this is the part a spec sheet cannot fix for you. Rotate the shaft against the wheel rather than holding it still, and lower it into the cut with steady, light pressure rather than pushing hard to get it over with. The moment that matters most is the very end of the cut: ease off pressure as the wheel is about to break through, rather than continuing at full pressure, because that final instant is exactly when an unsupported shaft is most likely to splinter or chip at the exit edge. A saw with a good rest and scale removes some of this risk, but the feed technique is still yours to get right.
The Cut Is Half the Job - Squaring Is the Other Half
Here is what almost no buying guide tells you: a freshly cut shaft end is rarely perfectly square, and the consequences land directly on accuracy.
An end that is even slightly off square does two things. The insert seats crooked, so the point sits fractionally off the shaft’s axis. And the shaft face does not bear evenly against the component, which shows up as wobble in flight. You can tune around a lot of things – spine, nock height, rest timing – but you cannot tune out a point that is not on the centerline.
The fix is an arrow squaring tool: a small abrasive fixture you rotate the shaft against until the face is true. It takes seconds per arrow and it is the step that separates arrows that group from arrows that nearly group. If you are buying a saw specifically to build your own carbon arrows, budget for a squaring tool in the same order.
Clean the Inside Before You Glue the Insert
Squaring fixes the outside of the cut. What is happening inside the shaft matters just as much and gets skipped even more often: abrasive cutting leaves fine carbon dust coating the inner wall near the cut end, and that dust sits between the insert and the shaft wall, weakening the glue bond before adhesive is even applied. A loose insert is not a cosmetic problem – it is the point separating from the shaft, and that can happen at full draw or on impact.
Clean roughly the last two inches inside the shaft with a cotton swab dipped in high-percentage isopropyl alcohol (91% or higher – lower grades carry oils that undercut the bond) until a fresh swab comes out clean. Avoid acetone and other harsh solvents on carbon; they can attack the resin itself rather than just lifting the dust. It takes under a minute per arrow and it is the difference between an insert build you trust and one you do not.
Does an Arrow Saw Pay for Itself?
Worth doing the arithmetic before you buy, because the answer is not automatic.
| Option | Cost | Break-even |
|---|---|---|
| Shop cuts them | About $1 per shaft; some shops $0.50, some around $18 a dozen | – |
| Shop cuts them, arrows bought there | Often free | A saw never repays on cutting alone |
| Rotary tool + shop-made jig | Around $35 | A few dozen shafts – but no scale, no dust control |
| Purpose-built arrow saw | Around $160 | Over 13 dozen shafts at $1 each |
So the honest position: if your shop cuts free with a purchase, or you build a dozen arrows a year, a saw does not pay for itself and never will. It repays when you are building repeatedly, experimenting with lengths, cutting for other people, or simply want to finish an arrow at nine at night without waiting for a shop to open. Those are all legitimate reasons – they are just not savings.
The same logic applies to a bow press: buy the tool for turnaround and control, not because the arithmetic says so.
How to Choose One
- Dust control – a vacuum port or water drip is the single most useful feature, and the reason to spend above the budget tier.
- A real length scale – repeatability across a dozen shafts is the whole point. Measuring each one by hand defeats it.
- A stable shaft rest and clamp – the shaft must be supported and must rotate cleanly against the wheel.
- Spare wheels – abrasive wheels are consumable. Check they are a standard size you can replace.
- Motor and rpm – these run at high speed by design; a heavier-duty saw matters mainly if you are cutting in volume, not for home use.
For the step-by-step of measuring and cutting to length, including manual and budget options, see our companion guide to arrow cutters. This page is about the powered saw itself.
We do not sell saws and there are no affiliate links here. Prices are US market figures and shop cutting charges vary a great deal – the fastest check is to ask the shop you would actually use what they charge, and whether it is free with a purchase.
Frequently Asked Questions
No. A toothed blade grabs the fibers and splinters the shaft, leaving a frayed end that will not seat an insert properly and can fail under load. Carbon has to be parted by abrasion – an arrow saw, or a rotary tool with an abrasive cut-off disc.
It should be treated as hazardous. Abrading carbon throws off very fine airborne dust that irritates skin, eyes and airway. Use a properly fitted P100-rated dust mask and eye protection, work somewhere ventilated, and keep the dust out of the air using a saw with water drip and vacuum extraction – or a spray bottle of soapy water on the blade and shaft.
Yes, and it is the step most often skipped. A cut end is rarely perfectly square, which seats the insert crooked and puts the point off the shaft centerline – that shows up as wobble in flight and cannot be tuned out. An arrow squaring tool takes seconds per shaft and is worth budgeting for alongside the saw.
Only if you build arrows regularly. Shops typically charge about $1 a shaft and often cut free if you bought the arrows there, while a purpose-built saw is around $160 – more than 13 dozen shafts to break even. Buy one for control and turnaround, not to save money.
In practice the terms overlap and shops use them interchangeably. Where a distinction is drawn, arrow saw usually means the powered abrasive cut-off unit with a length scale, and arrow cutter covers the wider category including simpler manual tools. This page covers the powered saw; the cutter guide covers the cutting process and budget options.
Yes, with an abrasive cut-off disc, and it is a reasonable budget route at around $35 with a shop-made jig. What you give up is a length scale, a stable rest and any dust extraction – so repeatability across a dozen shafts is harder and you need to be more deliberate about dust control.
Length follows your draw length and the setup you are building, and it interacts with spine – a shorter shaft stiffens, a longer one weakens. Measure carefully and cut long first, because you can always take more off. The full procedure is in our arrow cutter guide.
No, and aluminum is actually easier. An inexpensive tubing cutter gives a clean cut on aluminum with no abrasive wheel or dust involved – it crushes cleanly through a ductile metal tube. That same tubing cutter must never be used on carbon: instead of crushing a soft metal, it crushes the fibers, and a crushed carbon shaft can fail under load. Expect to chamfer and true the end after a tubing cutter, since it gets you close to square rather than guaranteed square.
A carbide-grit hacksaw blade – coated in tungsten carbide rather than having teeth – can part carbon by abrasion if dragged backward across the shaft and never pushed forward. It is slow and still produces dust, so the same mask and ventilation precautions apply, but it is a legitimate fallback. A standard toothed hacksaw blade and a tubing cutter are not substitutes – both damage carbon rather than cutting it cleanly.
Almost always leftover cutting dust inside the shaft. Abrasive cutting coats the inner wall near the cut end with fine carbon dust, and that residue sits between the insert and the shaft wall, weakening the bond regardless of how much glue you used. Clean roughly the last two inches inside with a cotton swab and 91%+ isopropyl alcohol until a fresh swab comes out clean before gluing – and avoid acetone, which can attack the resin itself.
Submit the Form to Get Our Product Catalog
What We Can Offer
- ✅ Low MOQ – from 1 piece, no minimum order
- ✅ Full customization – names, initials, club crests & team logos
- ✅ Mockup before production – see it before we make it
- ✅ Production time about 2 weeks after mockup approval
- ✅ Free remake on defects within 14 days of delivery
We reply to every inquiry within 1 business day.
Email: [email protected]
WhatsApp: +1 770 157 5807
Keep Reading
Arrow Cutters
The step-by-step manual-cutter process, and why a clean, square cut matters more than the tool price.
Arrow CuttersCarbon Arrows
The standard shaft material and how spine, not brand, decides whether your arrows fly true.
Carbon ArrowsArchery Tools Guide
What a home arrow-building bench actually costs at three budget tiers, and the one tool most archers over-buy.
Archery Tools Guide